Land Cruiser 40 Series To 80 Series Chassis Body Mounts (1979 – 1984)
Parts you will Need.
- Read Full Guide Before Fitting.
- Refer to your Engineer Of choose for weld produces and use of product in your country or state.
- Once chassis is fully Striped and cleaned ( Read chassis preparation Guide)
- Drill spot welds of factory body mount cups on 80 chassis. ( use the 4 middle small cups)
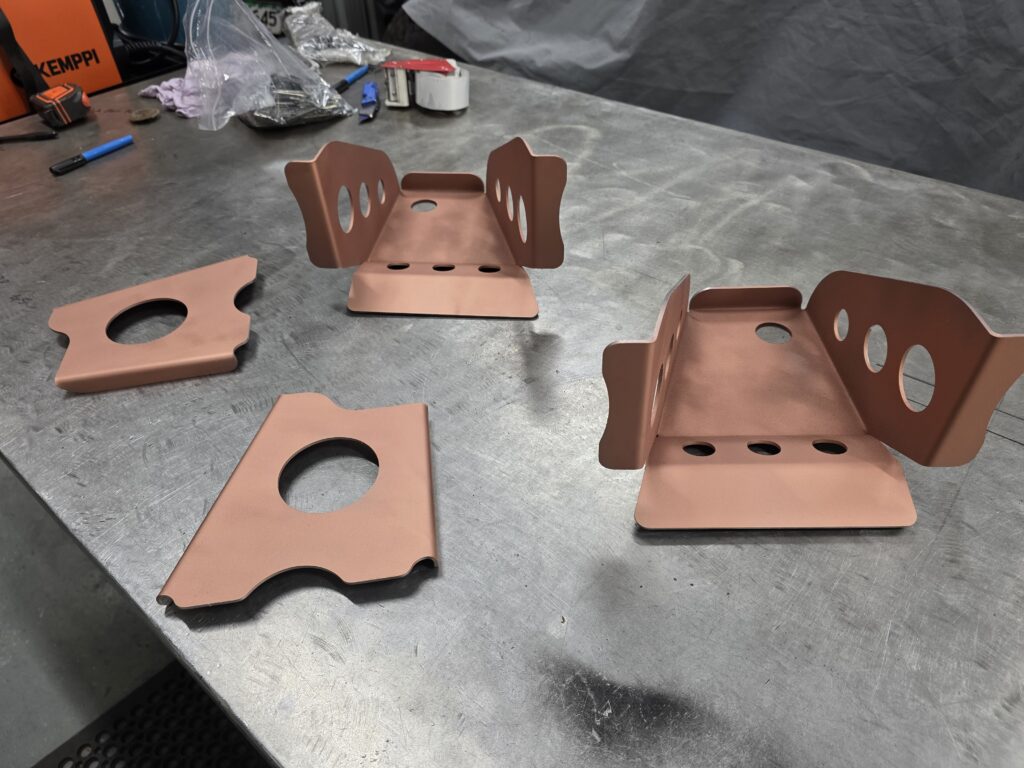
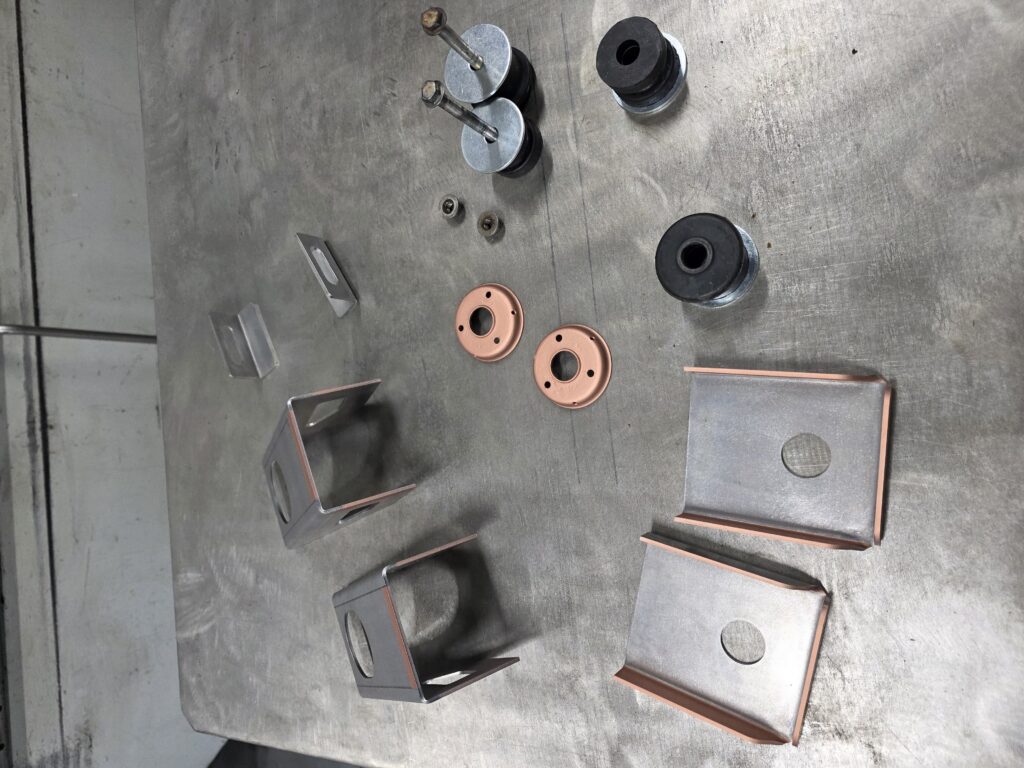
- 4 x Body mount cups and rubbers, bolts and crush tubes to suit. Buy a brand-new 80 series body mount rubber kit.
- weld through primer and good range of welding clamps.
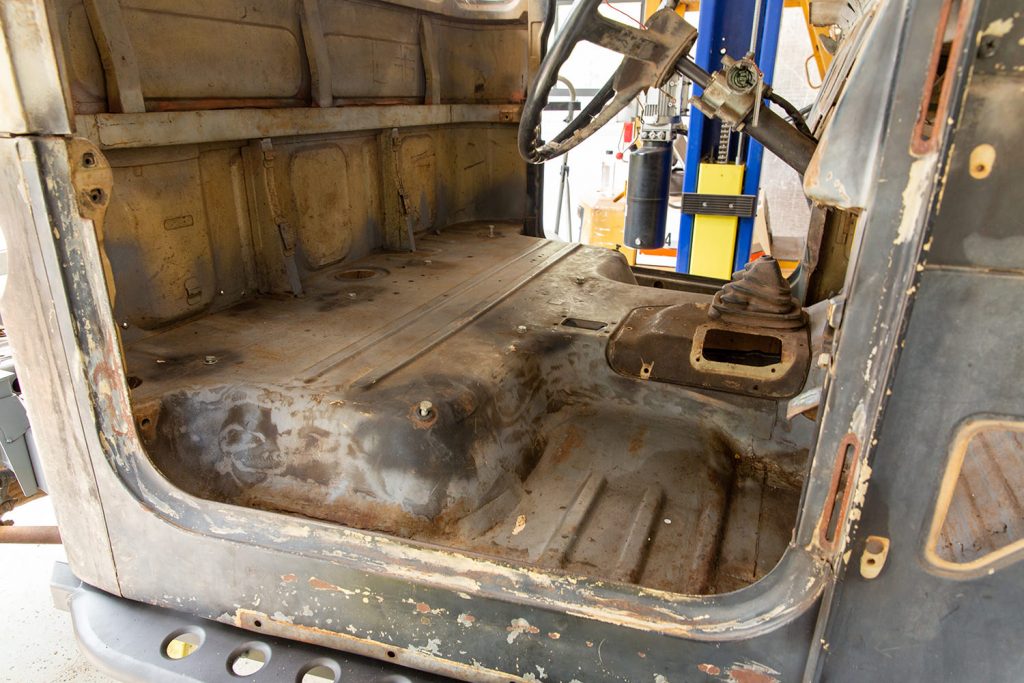
How to Work out your year of Cab : 1979-1984. Floor reference photo
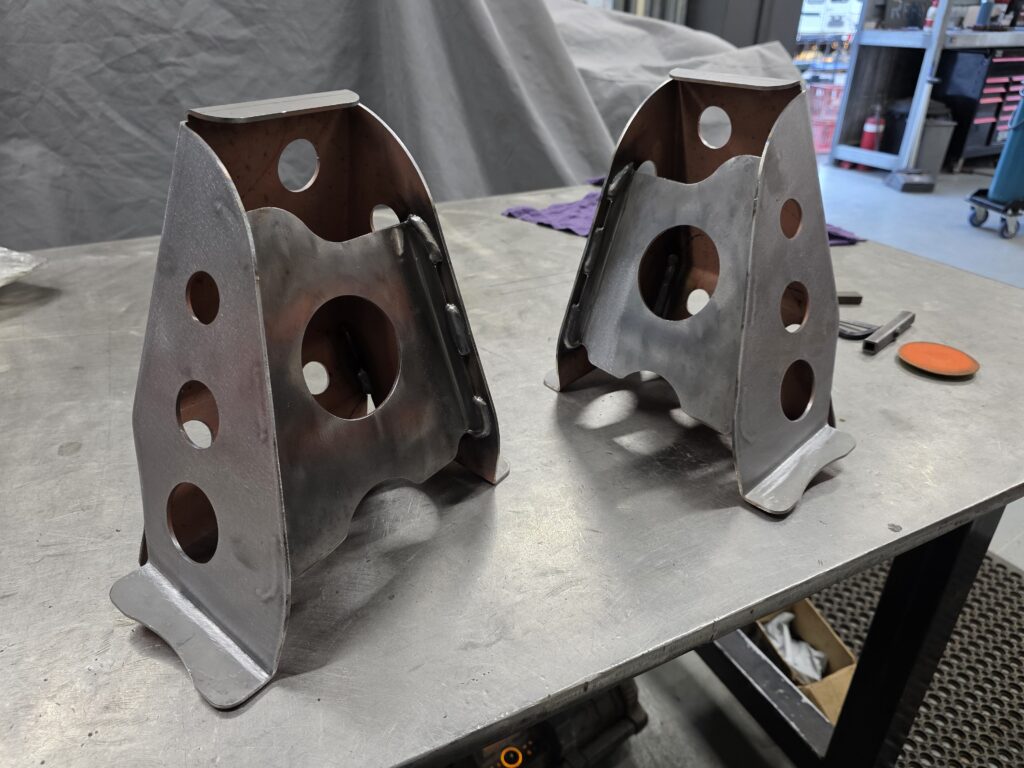
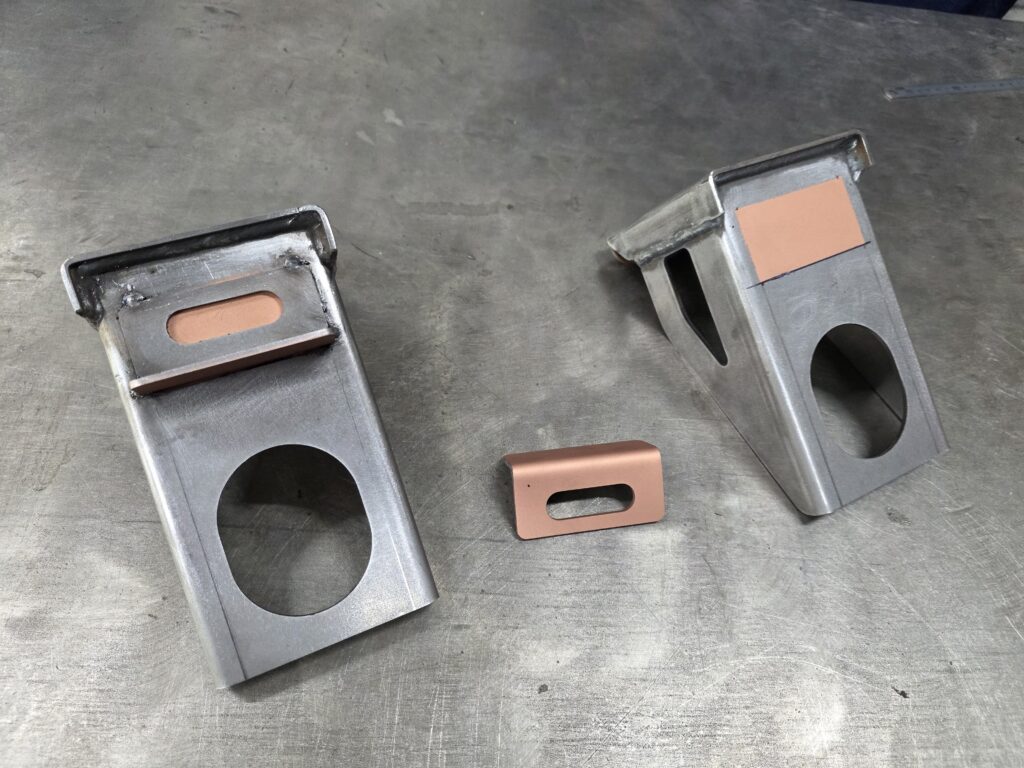
Front Body Mounts
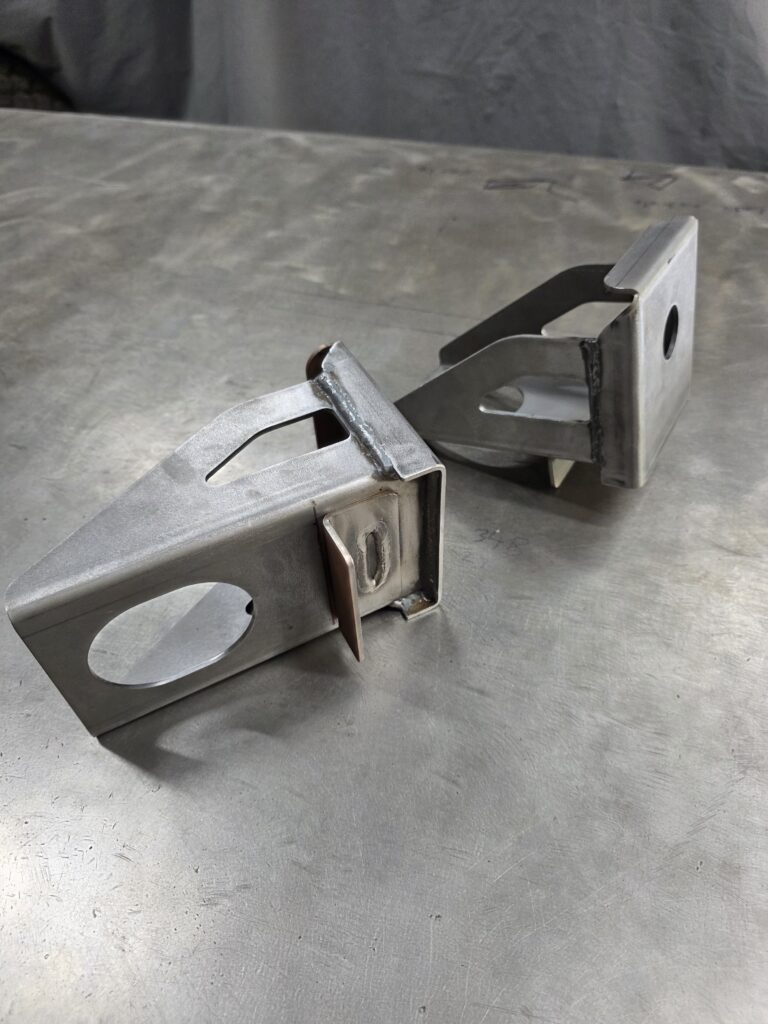
Rear Body Mounts
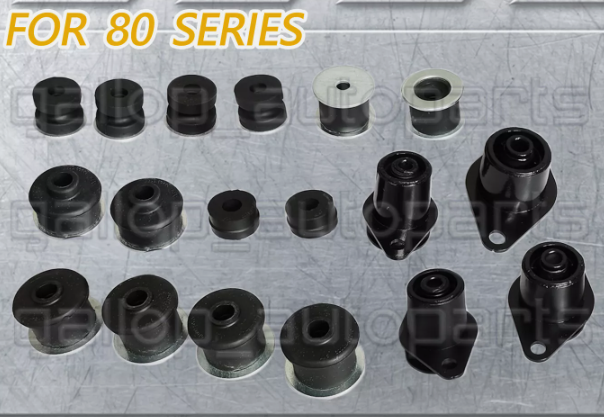
It’s important to start with a brand-new body mount rubber kit. New rubbers ensure correct fitment, which is crucial for setting all the correct heights — especially when fitting bar work and accessories. Old or worn rubbers can throw off alignment and cause issues down the line.
While genuine Toyota parts are always Great Quality , we’ve found that full rubber kits on eBay offer excellent value, with plenty of options to choose from.
For crush tubes, a handy tip is to use hydraulic hardline from a hose supplier. It’s typically already zinc-coated and fits an M10 bolt perfectly — a great solution.
Remove the 4 smaller middle body mount cups from the chassis.
-
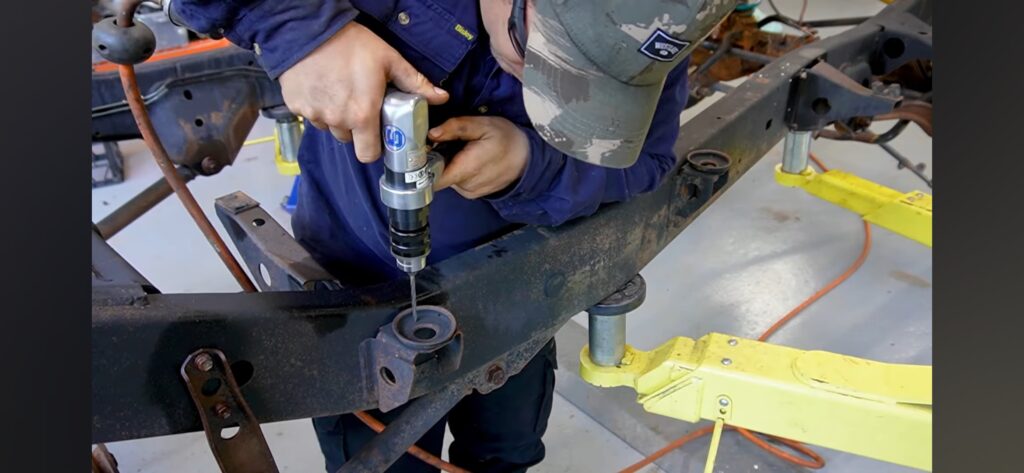
Drill Out the Spot Welds
Each cup is usually held in place by three spot welds. You can use a regular drill bit slightly larger than the welds to drill them out, but for a cleaner job, consider using a dedicated spot weld drill bit. These work well making them ideal for restoration work. -
Pry the Cups Off Carefully
After drilling, gently pry the cups off. Take care not to deform the metal or the cups themselves, Because you need to reuse them.
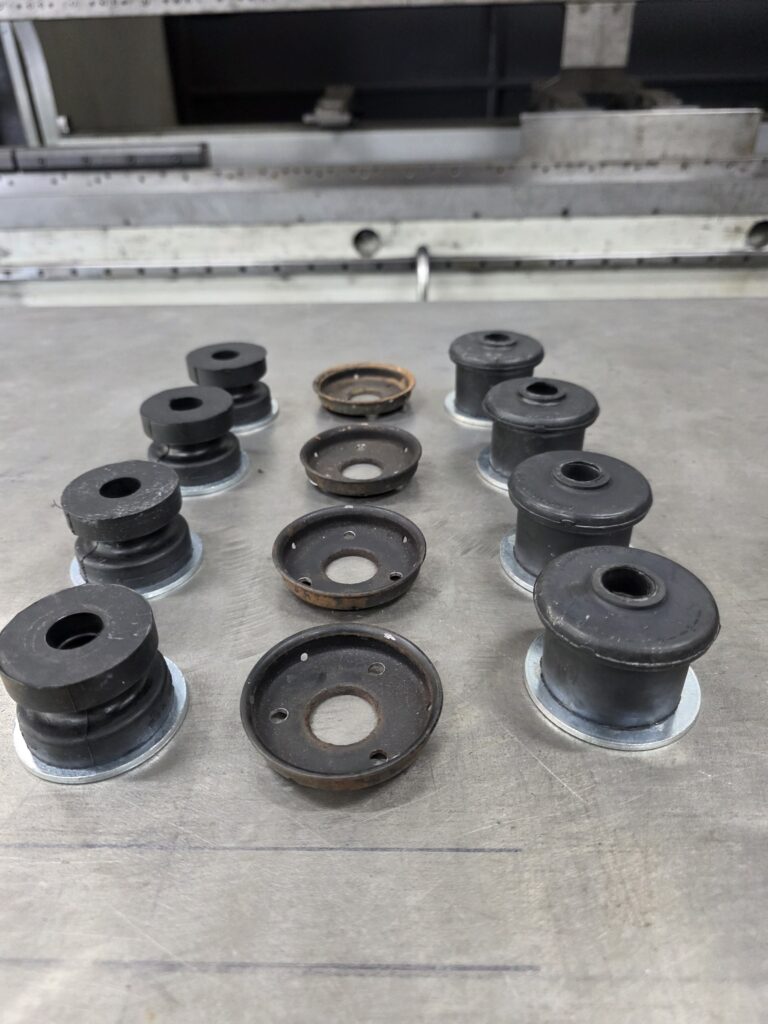
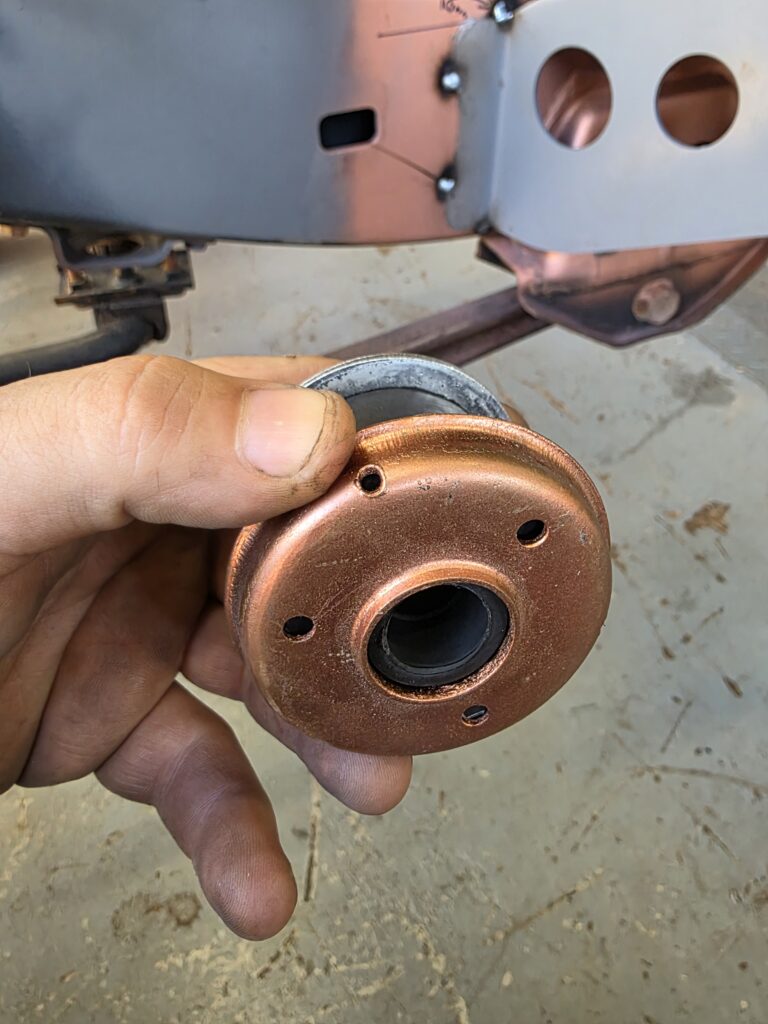
With the body mount cups removed , we use 42mm body mount rubbers with matching cups. make sure you use the crush tubes to suit if your factory ones are rusted you can match up the size with hydraulic hardline and cut to suit theses are also already zinc coated.
Weld-through primer is a specialized coating used to protect metal surfaces from corrosion.
Preparation
Welding
- Once the parts are tacked and prepared for welding, it’s important to clean the edges, While the design allows for welding through paint, welding on
Prep chassis back to bear metal.
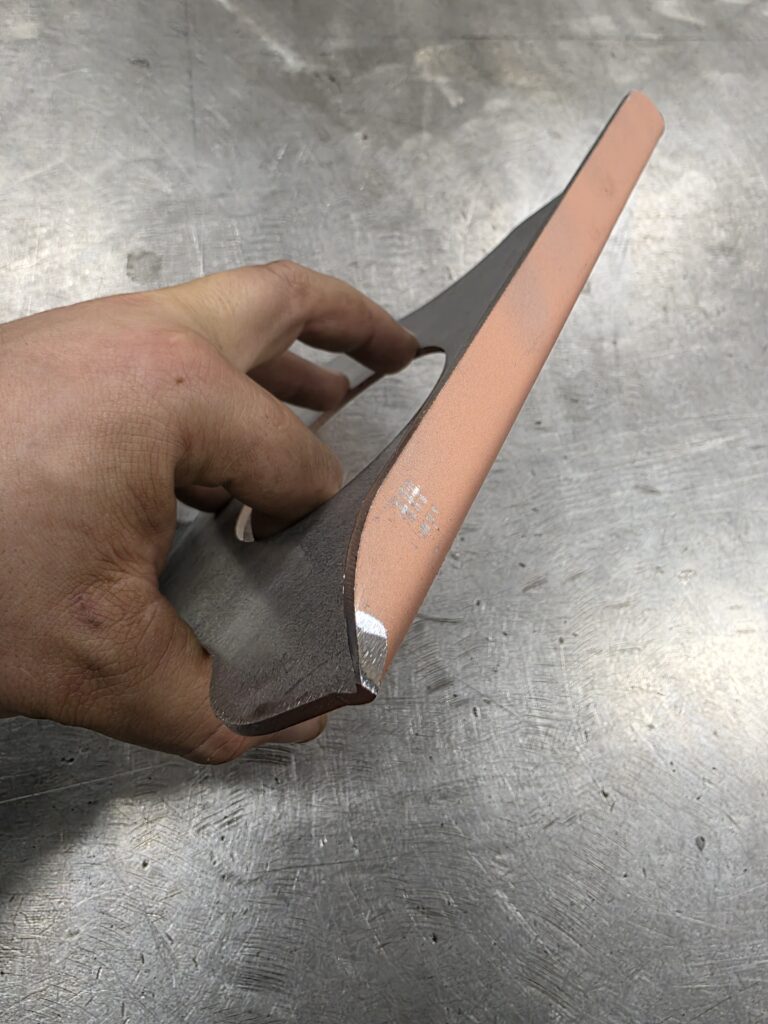
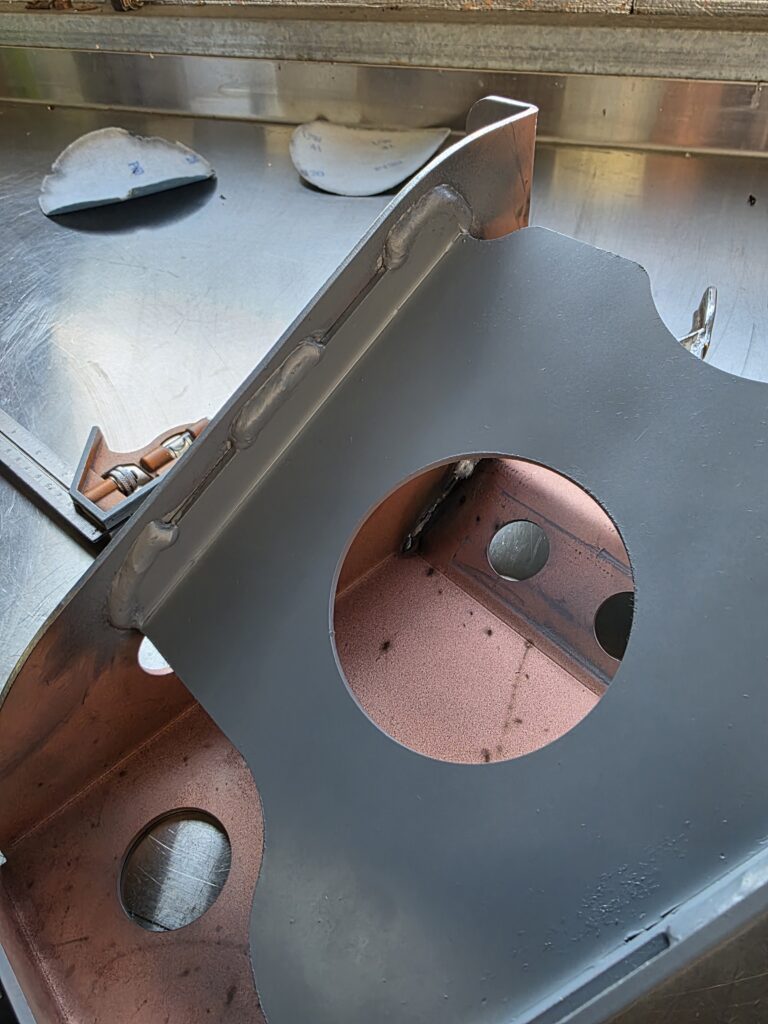
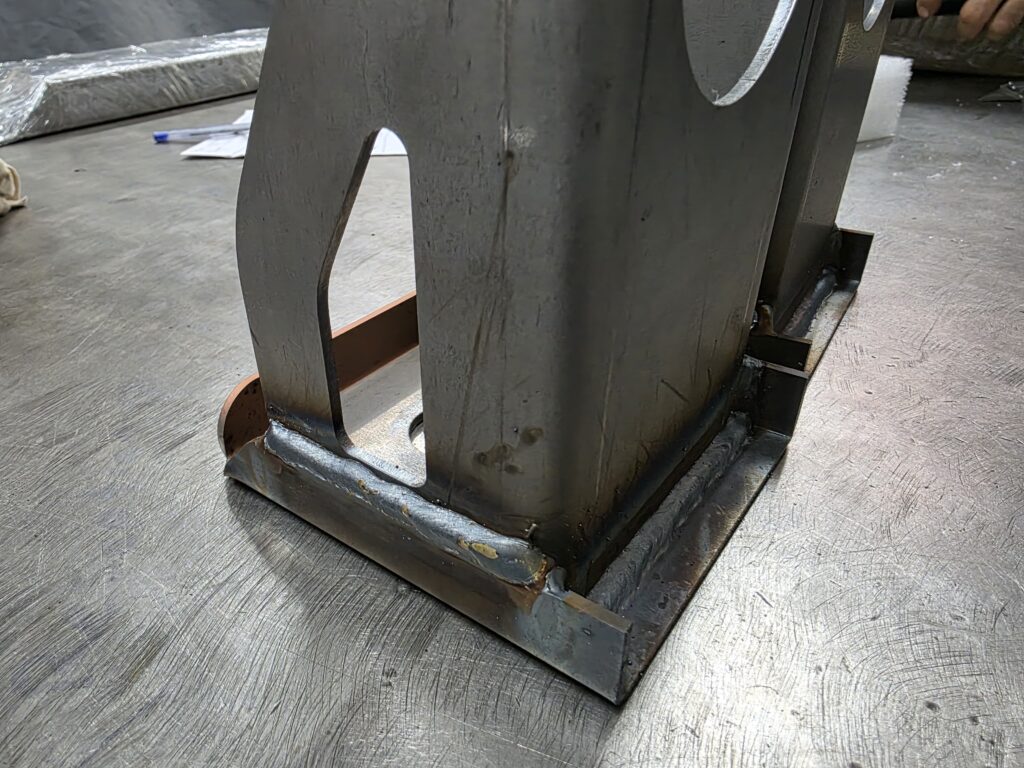
It is important to linish the corners flat in this step, as bending a flange to a taper during the manufacturing process creates a burr. This burr can affect tolerances and must be removed to ensure proper fit and finish.
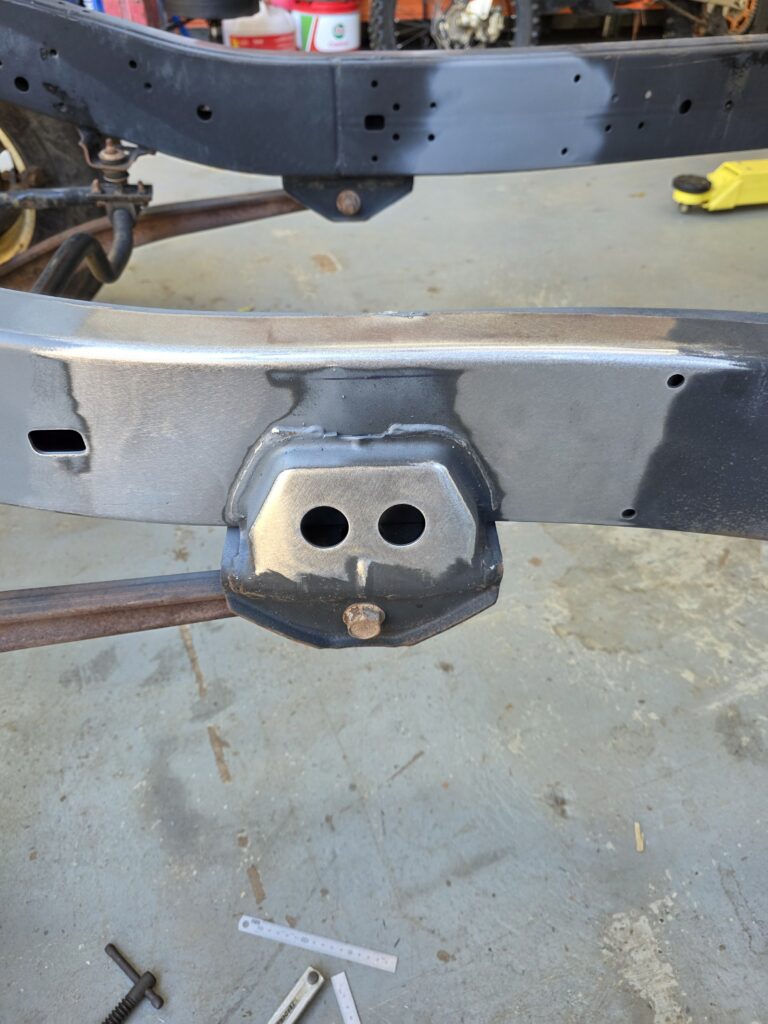
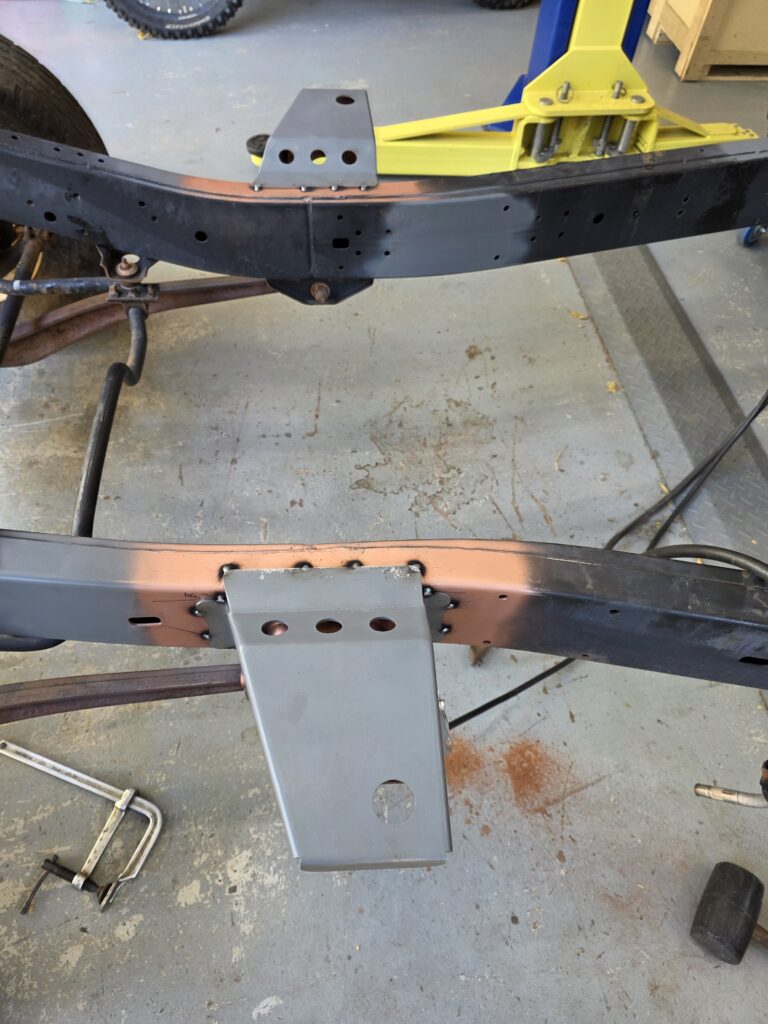
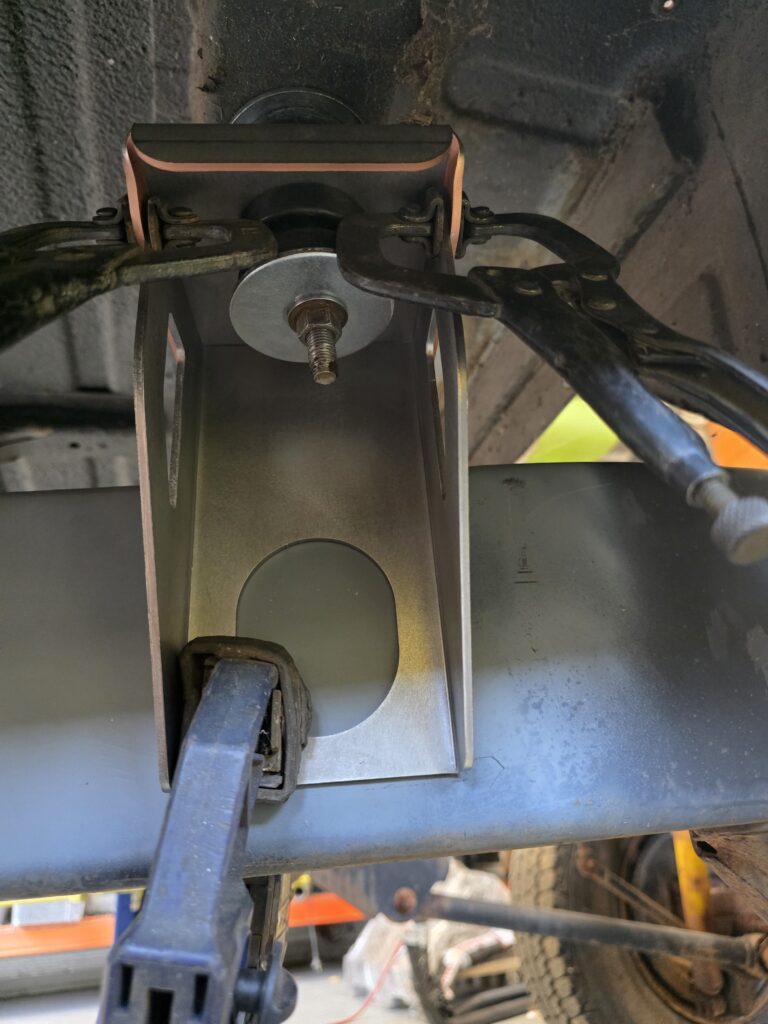
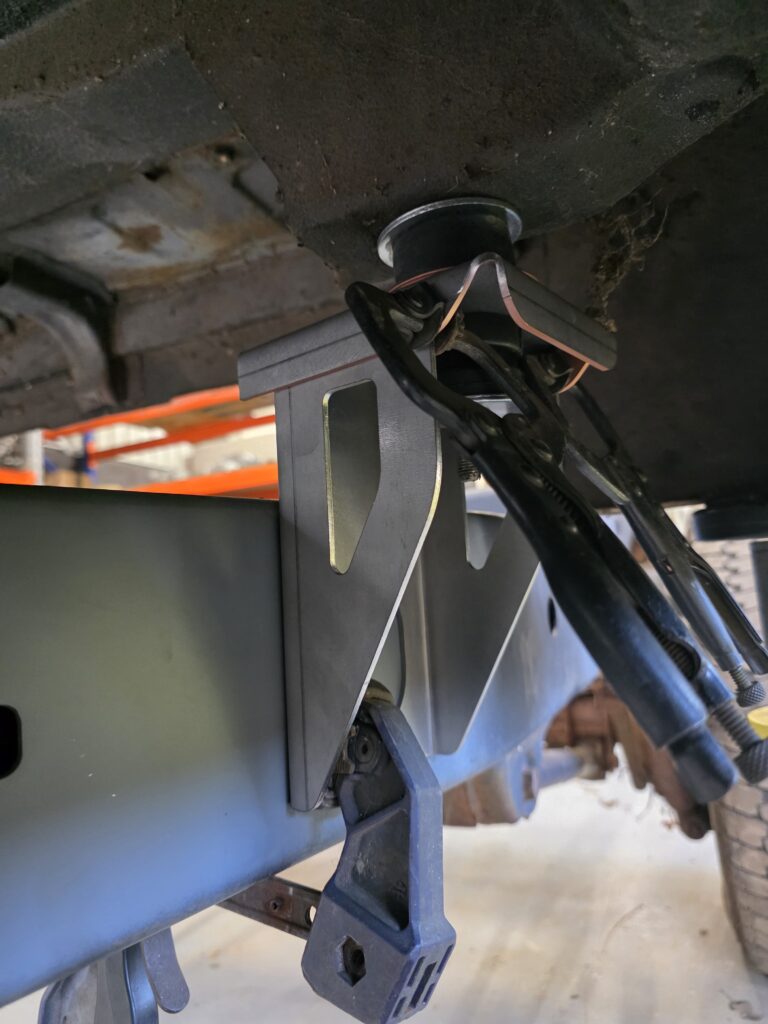
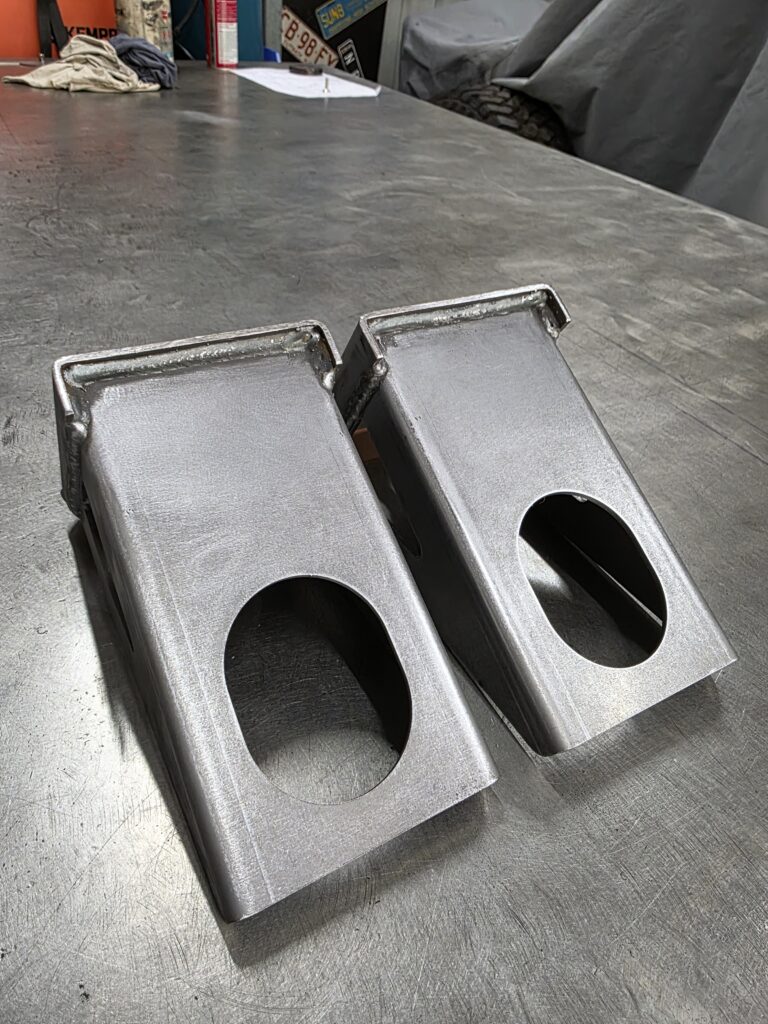
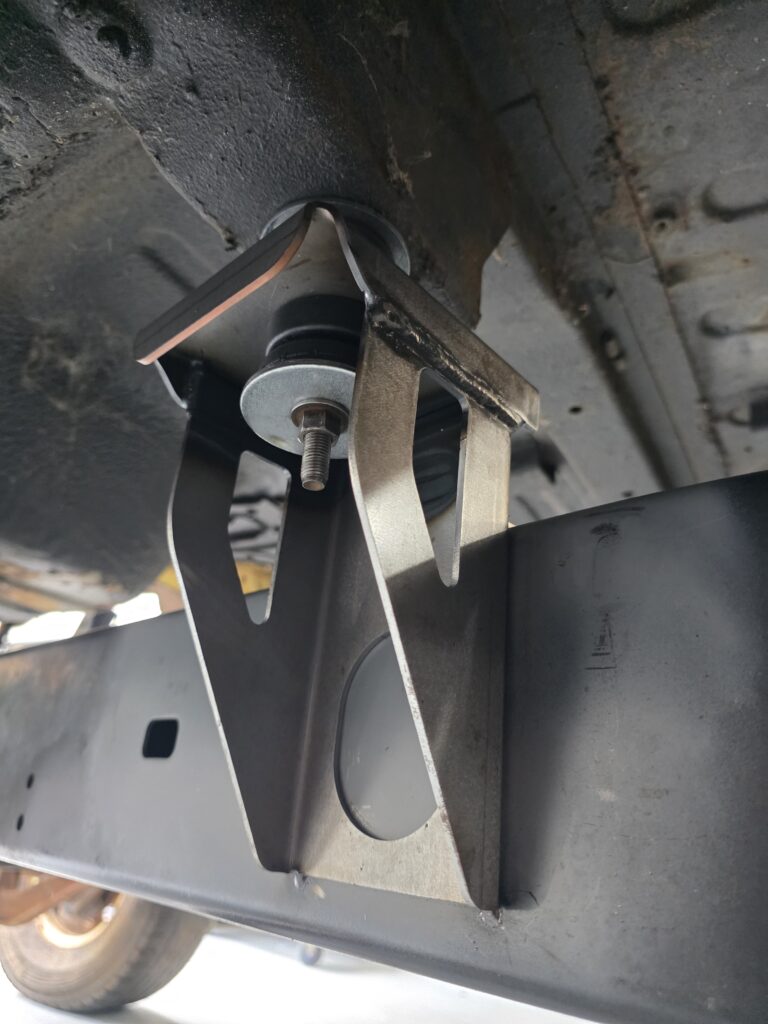
Use the chassis to mock up the front mount. The mounts are side-specific, with distinct left and right versions. Ensure the body mount hole faces the rear of the chassis. The smart design allows the mount to straddle the front radius arm for proper alignment.
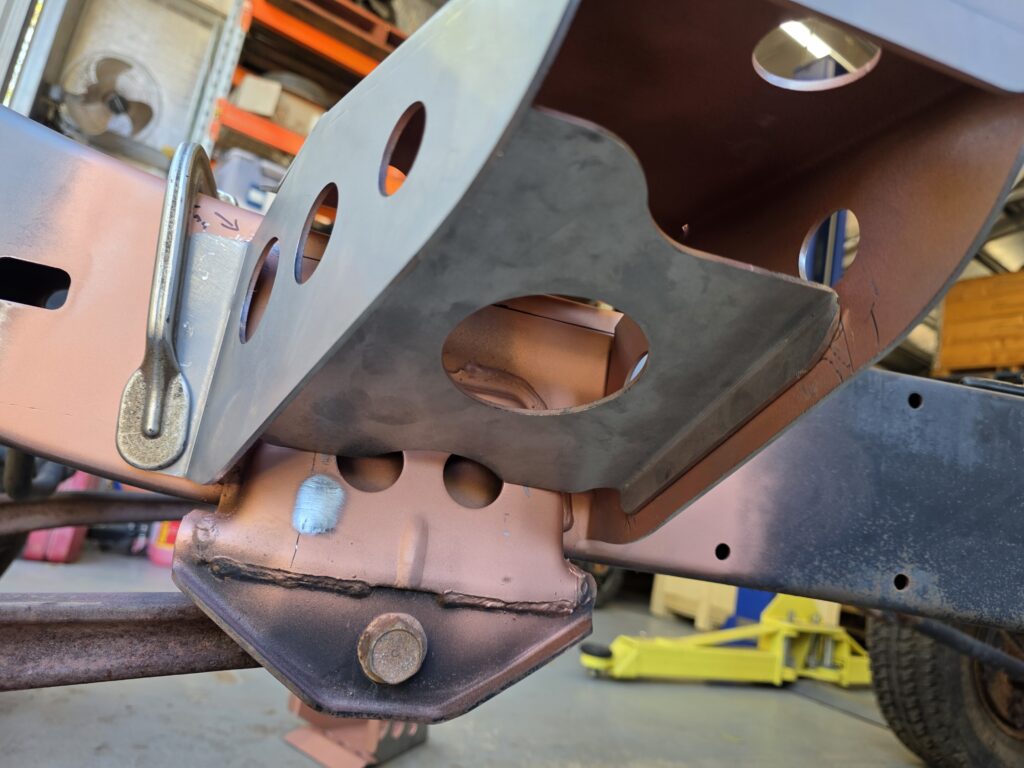
Make sure the center gusset touches the front radius arm mount
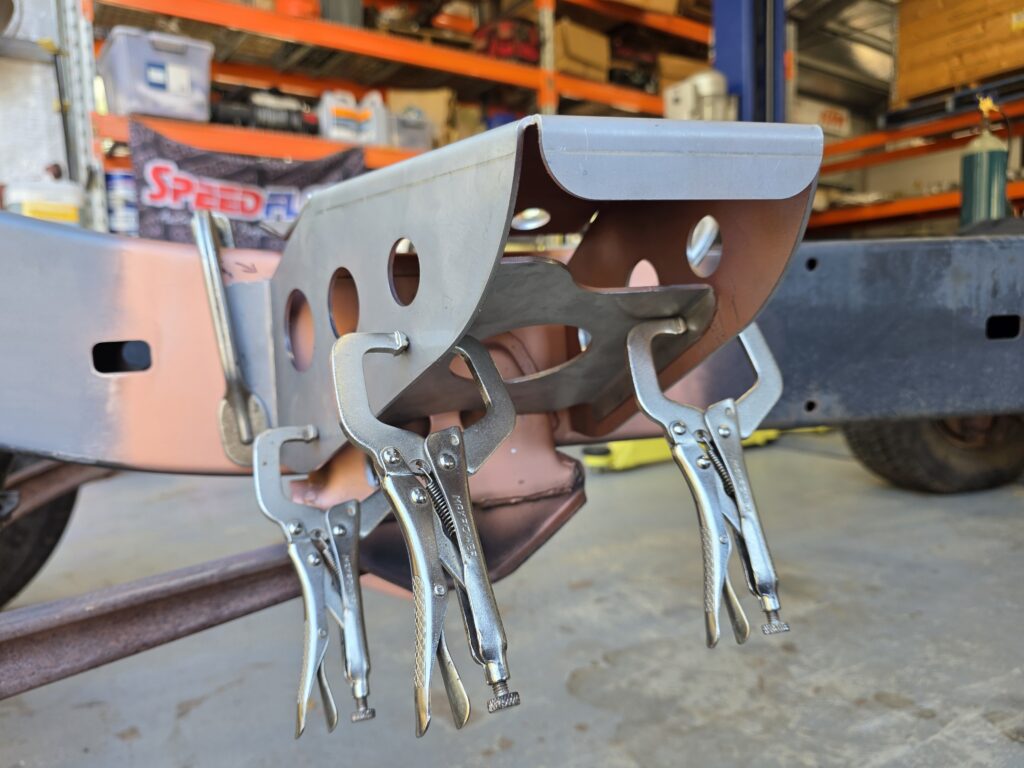

Before fully welding the front body mounts, double-check their fitment. As shown in the picture, the body mount hole should face the rear of the chassis.
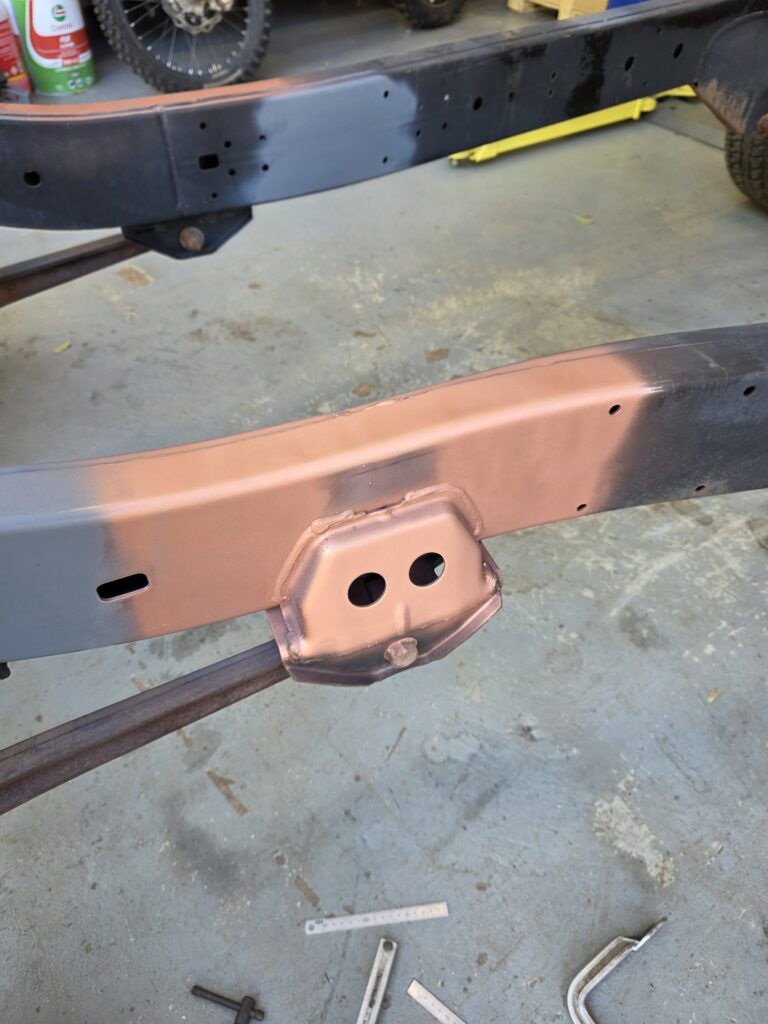
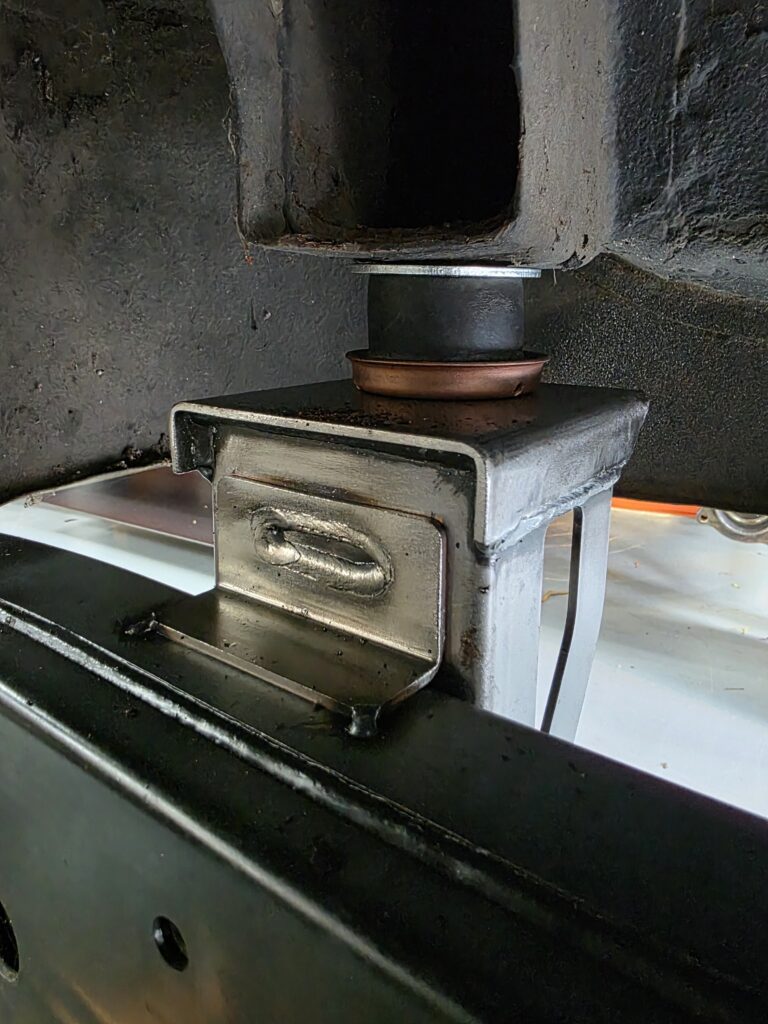
we place even stich welds on center gusset be sure to weld round corners for added strength we also weld both sides of top and bottom on top flanges we like to metal finish for a flush look.
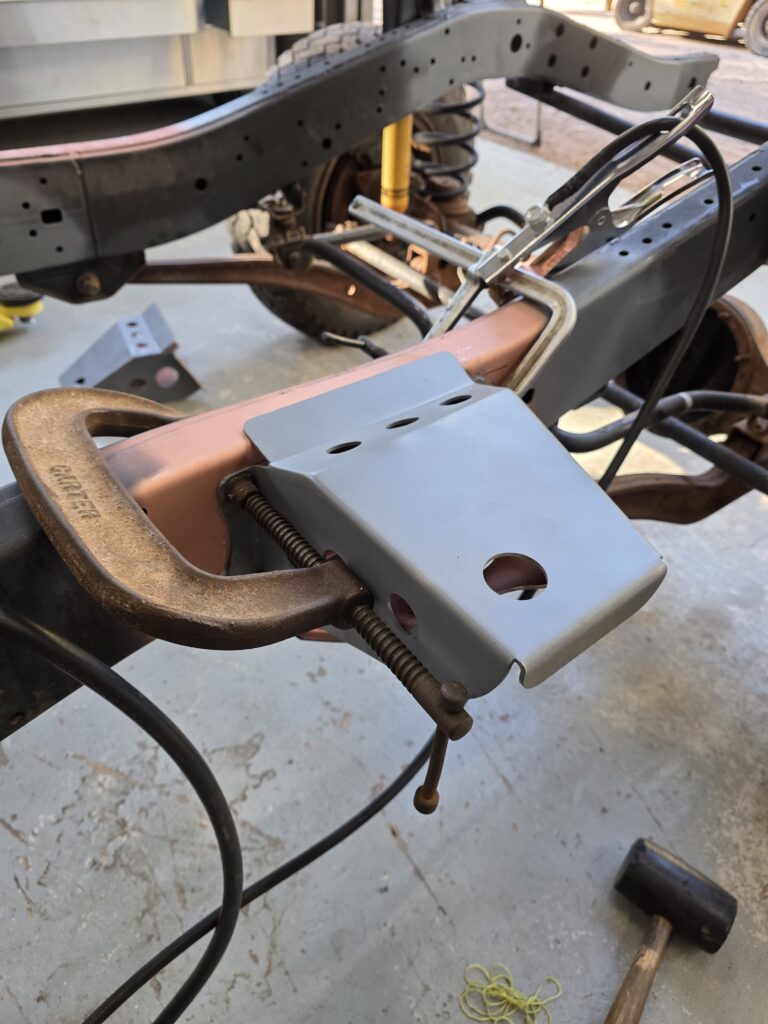
Before you tack the front mounts in there final place make sure the Body mount hole is facing towards the rear of the chassis the only way you can get the installation wrong is mixing up the left and right.
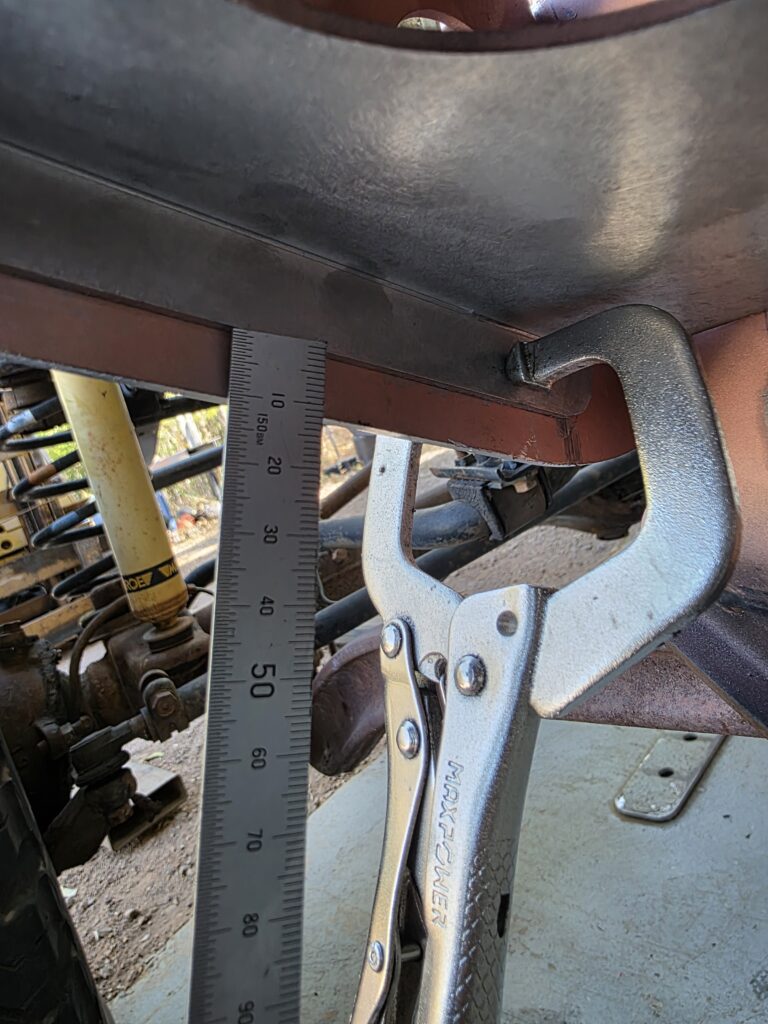
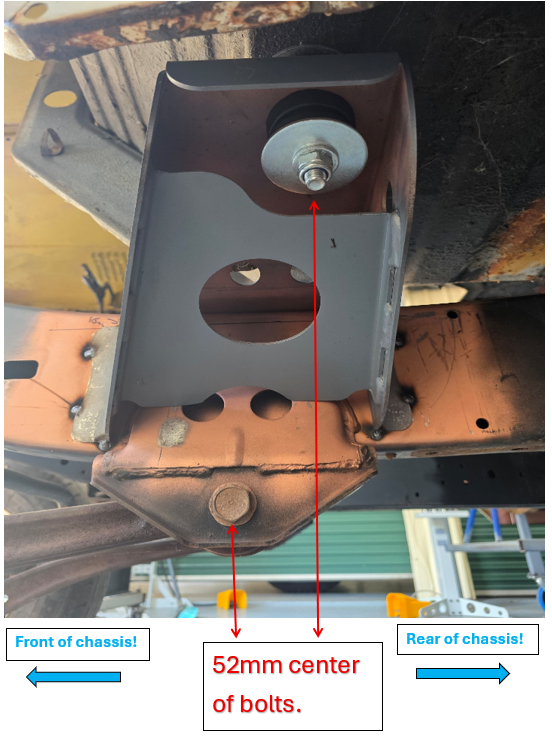
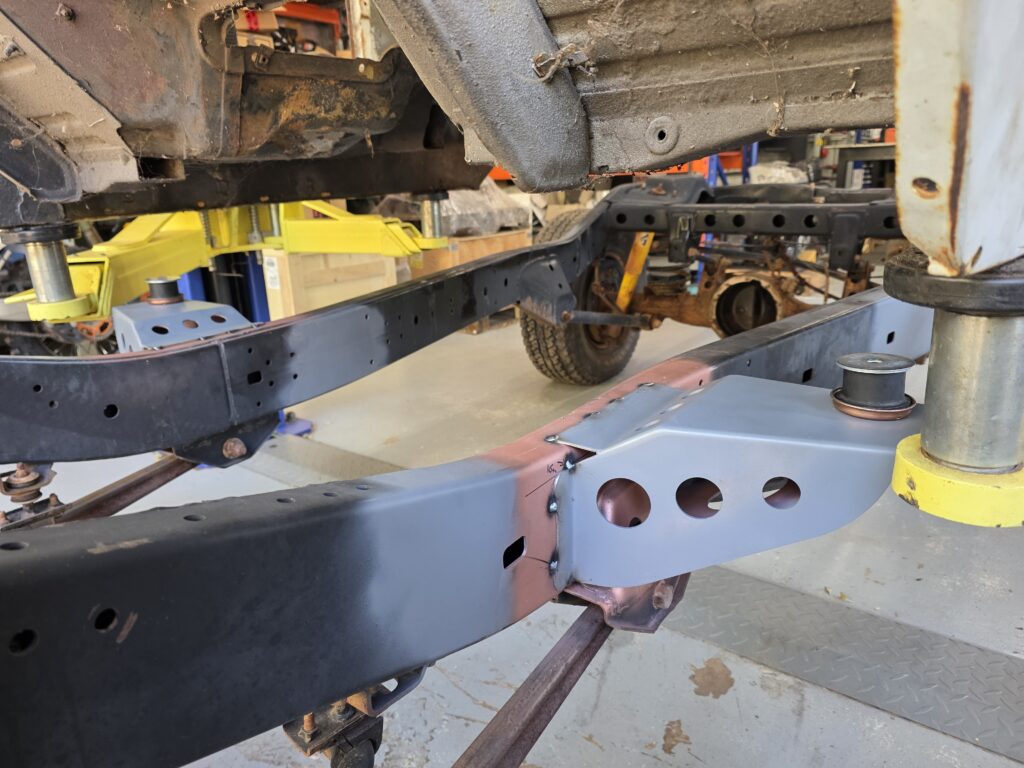
For final positioning, measure from the center of the factory radius arm bolt to the center of the body mount hole. This distance should be 52mm rearwards from the center of the factory radius arm bolt.
Our clever design allows the mount to be positioned centrally on the chassis and aligned with the center of the radius arm mount . Refer to the following simple reference photos to assist with alignment.
Once you’re satisfied with the fitment, tack weld the mounts together. Use clamps to align all parts accurately, and apply standard fabrication techniques to ensure proper fit

We prefer to use line lasers in the shop for greater accuracy. To use this method, first ensure the chassis rails are level. Then align both radius arm bolts using the laser’s auto-leveling feature. Measure from the center of the bolt to the laser line for precise alignment.
We understand that not everyone has access to laser tools, so traditional methods—such as plumb bobs, spirit levels, and squares—can also be used to achieve the same results with care and patience.
Now it’s time to fit the body. We use the body itself as a jig to position the body mounts. This approach allows for adjustments to suit each individual car—especially since we’ve found that 40 series bodies are often not perfectly square.
Do not weld the body mount cups in place yet. First, square up the body on the chassis. This ensures you retain adjustment before final welding.
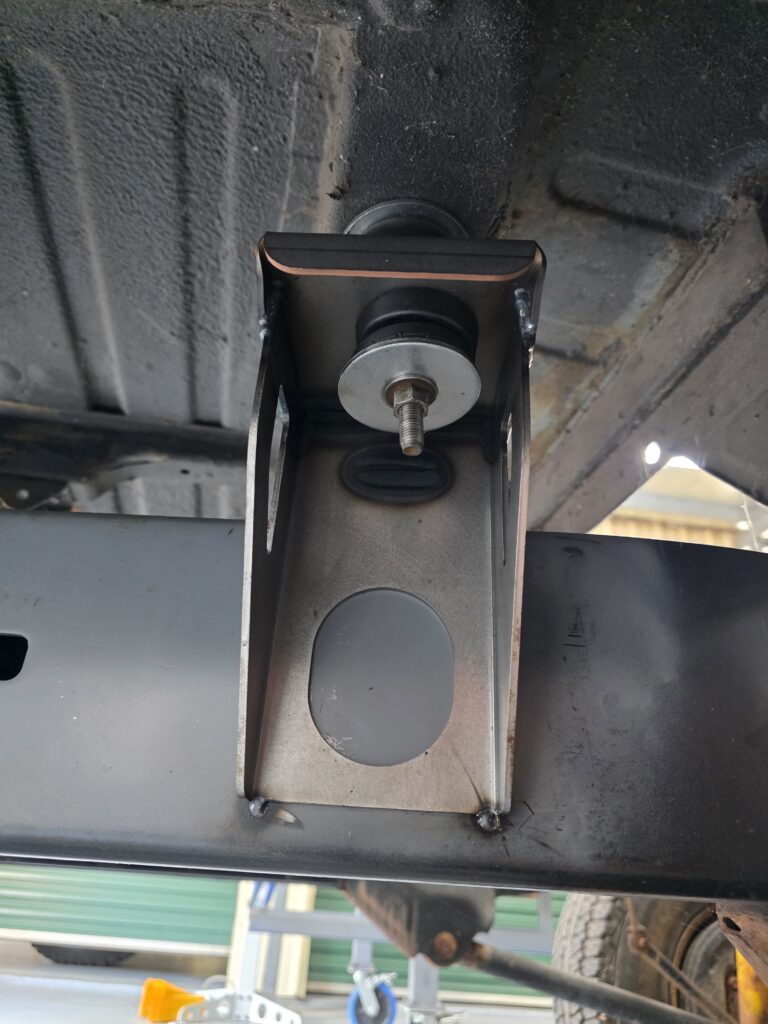
After lowering the body onto the chassis, carefully align the front body mount bolt holes.
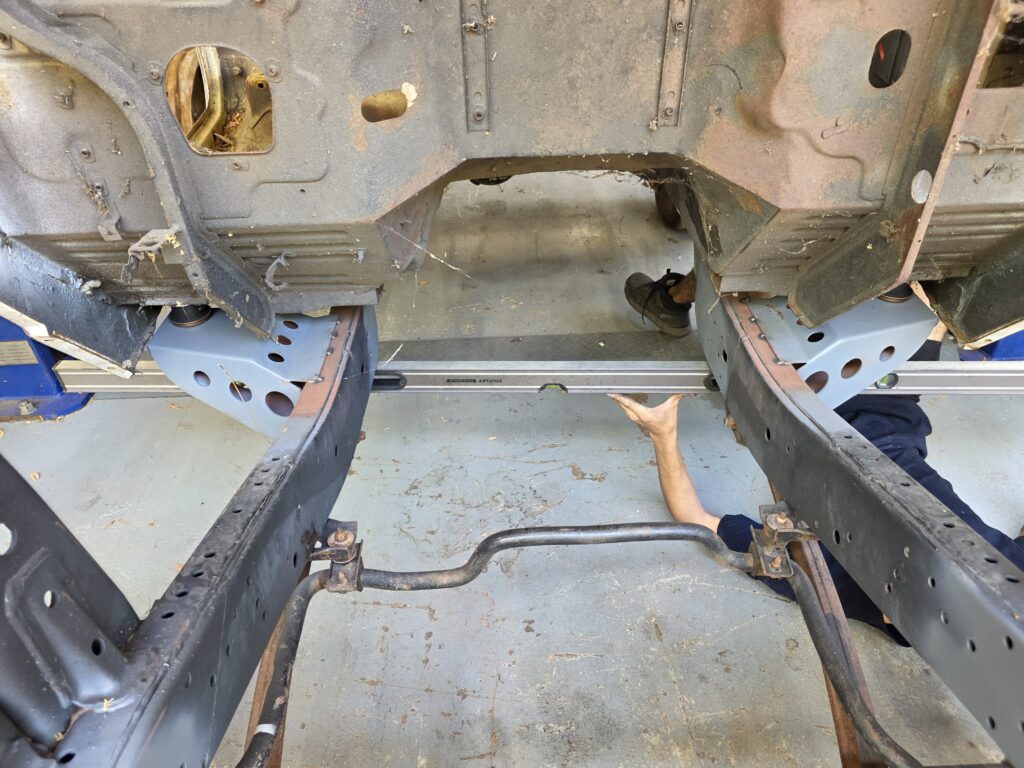
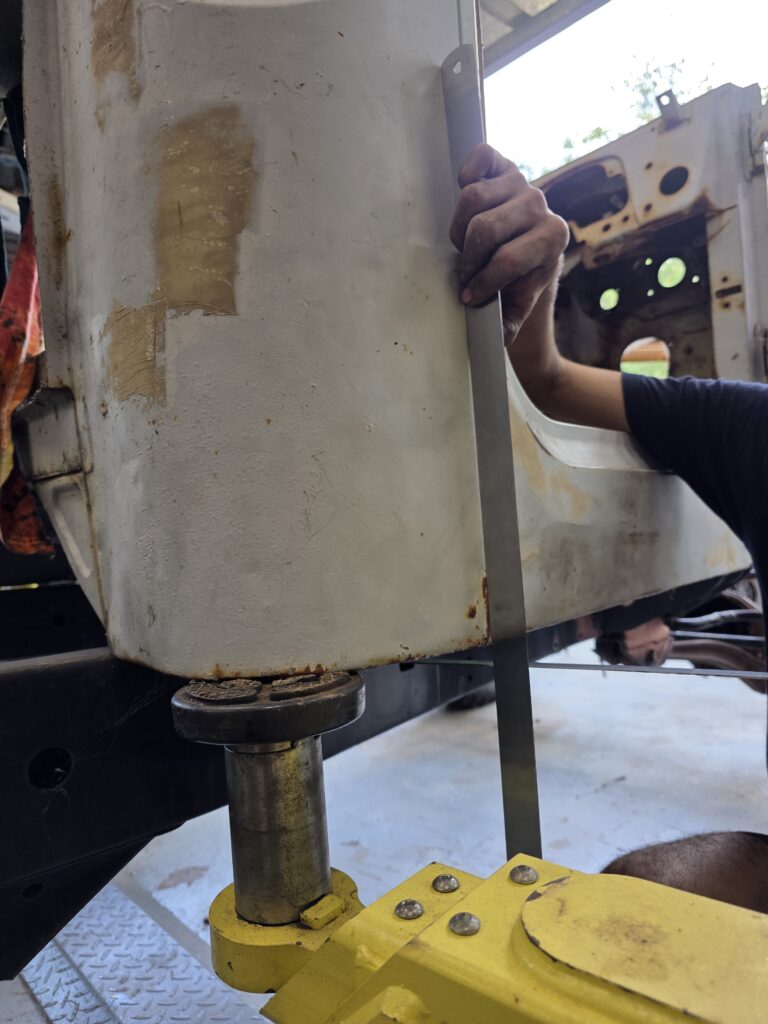
Use a 2-meter level as a straightedge underneath the chassis rails. Measure from the level up to the bottom of the sills at both the front and rear. This will ensure the cab is sitting level on the chassis.
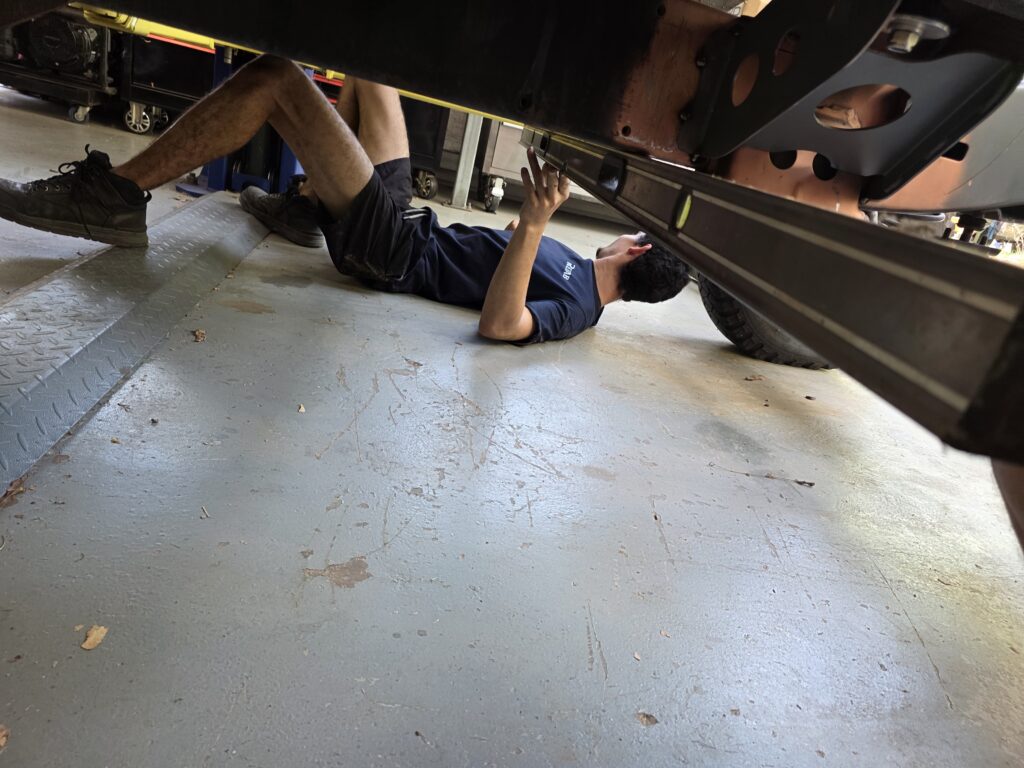

Ensure the cab is sitting evenly on all four corners. Check that the sills aren’t bent or distorted, as this can affect alignment. Take multiple measurements to confirm everything is square and level before proceeding.
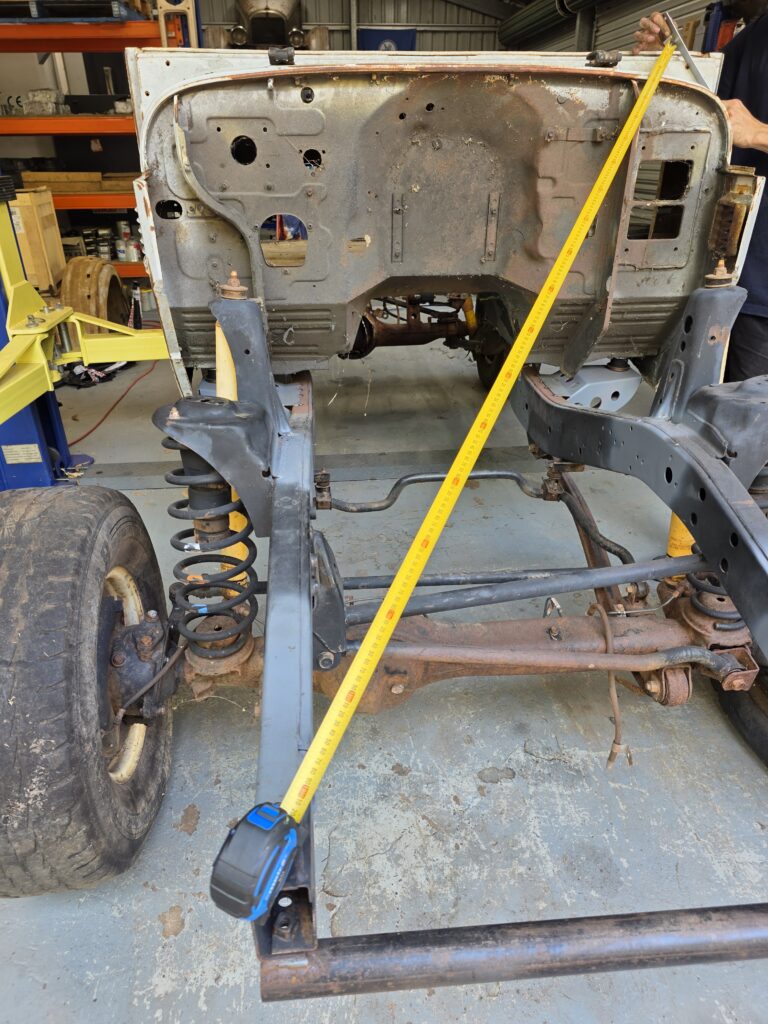
It’s important to take multiple measurements from various parts of the cab. Use straight edges and reference factory holes on both the chassis and body to assist with alignment. Take your time during this step—measure side-to-side and diagonally to ensure the cab is sitting square on the chassis.
Once you’re satisfied with the fitment and the body is sitting level and square, tighten the front body mount bolts to hold it securely in position.
Prepare rear body mounts!
Align the body mount in place use clamps and doble check all measurements ensuring everything is square.
Weld Out Mounts:
-
Fully weld the mounts in place once alignment and measurements have been confirmed.
-
After welding, trim down the rear of the top plate as required.
-
Note: The top plate is intentionally left long to allow adjustment and ensure a proper fit to these older cabs.
-
Now prepare the top gusset.
Final Fitment:
-
Once you’re satisfied with all body mount positions, proceed with the final fitment.
-
Mark around the body mount cup rubbers to record their exact locations.
-
Spot weld the mounts in their final positions to secure them permanently.
Final Summary:
Leave all mounts tacked to the chassis at this stage. Consult your engineer before carrying out any final welding.
We recommend completing the full chassis weld-out once the project is finished and the chassis can be positioned comfortably. This approach ensures you can achieve strong, clean welds, and if any adjustments are needed during the build, it’s easy to cut the tacks and reposition the mounts as required.
Final Note:
Happy building! Take your time and enjoy the process — there’s no need to rush. Quality work always takes time and attention to detail.
We have a fully equipped shop ready to supply all your parts. Every component has been developed through years of research and development to ensure the best fit and performance for your build.