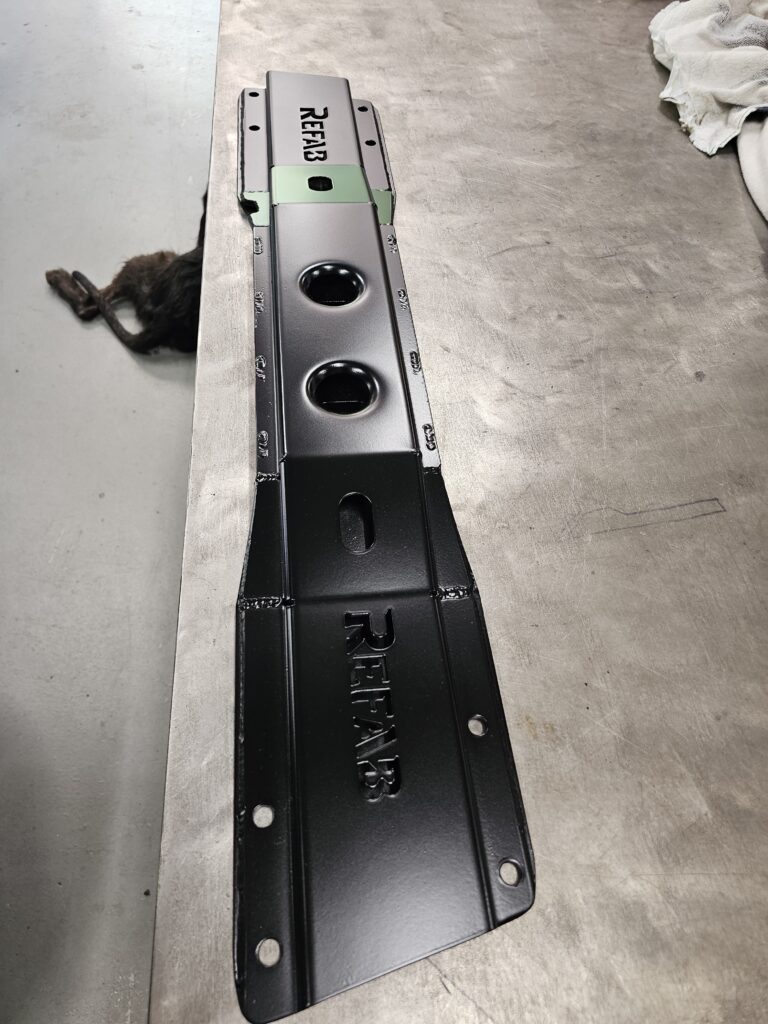
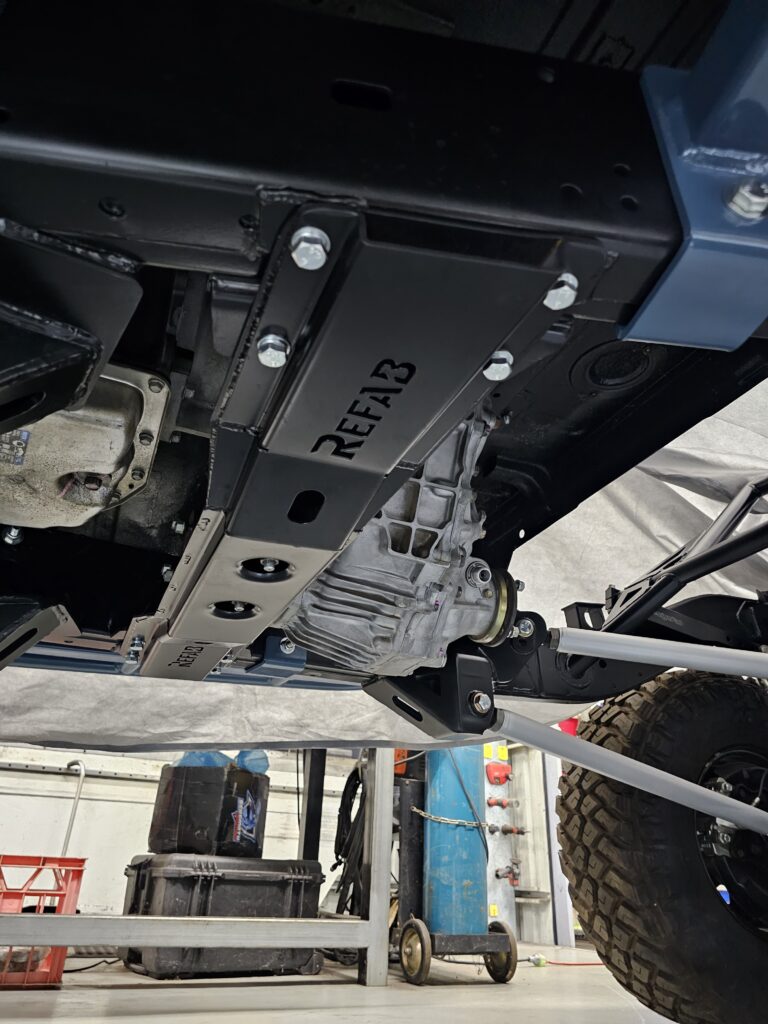
40 Series Land Cruiser To 80 Series Chassis Gearbox Cross Member
Make sure you read Engine Mount Guide to prepare the Engine before starting !
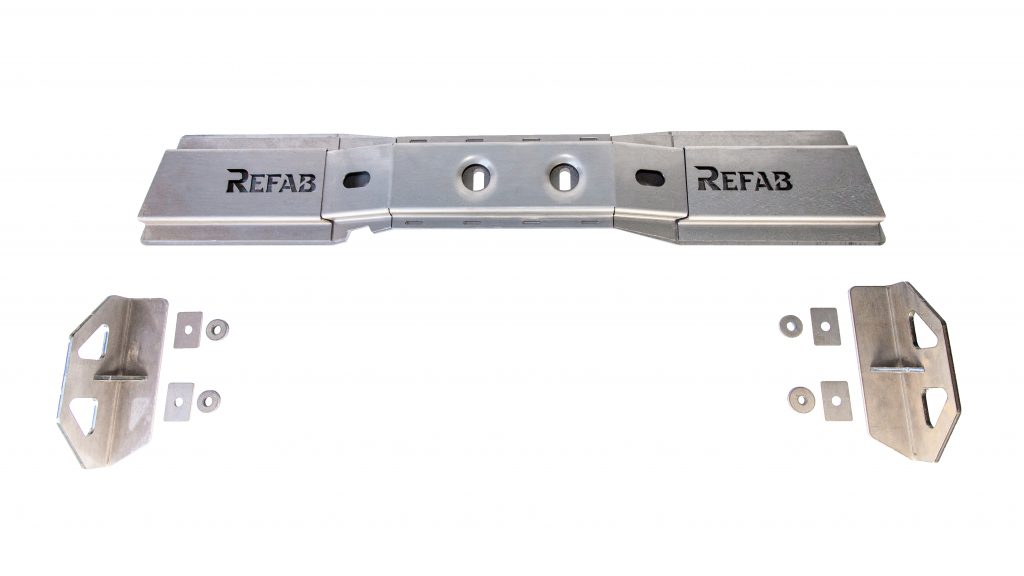
The Gearbox Cross Member installation requires the following parts:
- Refab engineering engine mounts if doing a 40/80 build
- 80 series gearbox rubber mount (Toyota part number: 12371-61050)
- 8x35mm M10 bolts (with nuts, flat washers, and spring washers to fit).
Important Notes:
Ensure you read the full guide before installation.
Consult an engineer for welding procedures or any necessary chassis modifications for use in your specific region (country or state).
Weld-through primer is a specialized coating used to protect metal surfaces from corrosion.
Preparation
Clean the Surface:
- Before applying the weld-through primer, thoroughly clean the metal surface to remove any rust, dirt, grease, oil, or other contaminants. You can use a wire brush, abrasive pad, or solvent to clean the surface.Dry the Surface: Ensure the surface is completely dry before applying the primer to avoid any moisture that might interfere with the application.
Aplication
- The Weld-through primer should only be used to coat parts that can’t be painted after welding, not as a regular primer. Ensure it is completely dry before tacking parts together.
Welding
- Once the parts are tacked and prepared for welding, it’s important to clean the edges, even if wire attachments are used. While the design allows for welding through paint, welding on bare metal typically results in better weld quality.
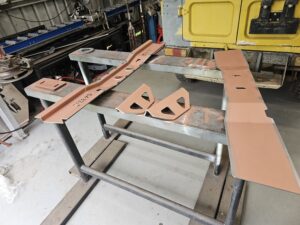
Paint all parts That cant be painted after welding with weld though primer
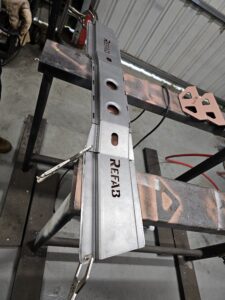
To square the gearbox cross member for welding, use clamps and fabrication techniques to secure the piece in place. Ensure the transfer case cutout is properly aligned before welding. This involves carefully adjusting the cross member to ensure everything is level and in the correct position, using clamps to hold it securely while making final checks for alignment before proceeding with the weld.
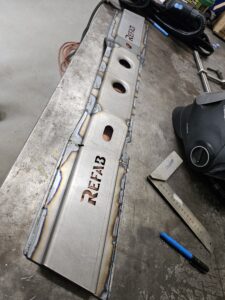
The crossmember is fully TIG welded, but MIG welding is also acceptable. For MIG welding, only stitch welds are necessary. Be sure to consult your engineer before proceeding with the welding process.
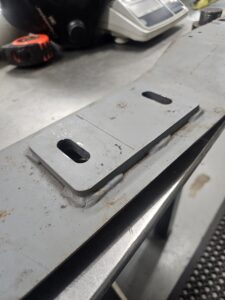
Weld 12mm spacer to cross member this only needs to be stitch welded.
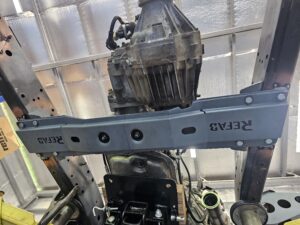
It’s crucial to mark the centre line on the crossmember. To make sure its in the right place , simply align the centre of the crossmember with the centre of the chassis. This will insure factory fitment.
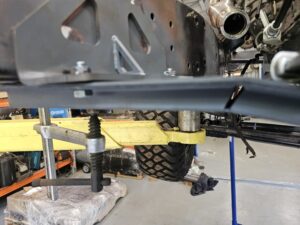
- Bolt the crossmember to gear box use the center of the slotted holes.
- Jack crossmember hard against chassis rails.
- Use G clamps to secure the crossmember in position before making any modifications.
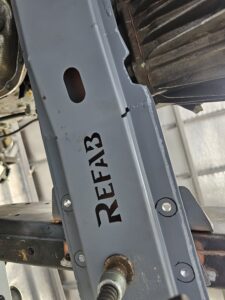
Once you are certain everything is in the right place you can begin to drill.
- see in the picture there are circles marked out this is to insure you can still fit a socket to undo the nuts.
- start of with drilling all the holes with a small drill bit G clamp the chassis brackets as well, also drill them at the same time.
- Once all the holes are drilled, you can remove the components and finish drilling the gearbox crossmember and chassis brackets on a bench or with a drill press for more ease.
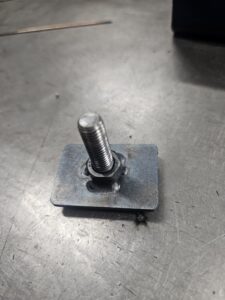
Weld captive nut plates.
- Weld 4 x 3mm captive nut plates to 10mm nuts.
- use a sacrificial bolt to Align and leave in whilst welding .
- make sure threads are cleaned with a tap and do not cross thread new bolts.
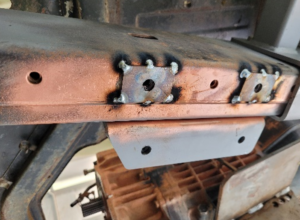
Mounting captive nut plates .
- Drill and Prepare the Chassis: Ensure the captive nut plate sits flat. You may need to use a die grinder to remove additional material if necessary.
- Deburr Holes: Smooth out any rough edges around drilled holes.
- Remove Swarf: Use a flexible magnet and an air gun to clear any swarf (metal shavings) from inside the chassis rails.
- Prep for Welding: Apply weld-through primer to areas that will be welded but cannot be painted afterward. This helps protect them during the welding process.
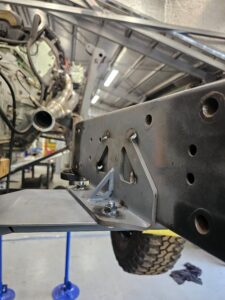
Fitting crossmember to chassis .
- loosely bolt captive nuts to crossmember
- align crossmember and fit chassis mounts flush.
- weld captive nuts to chassis brackets.
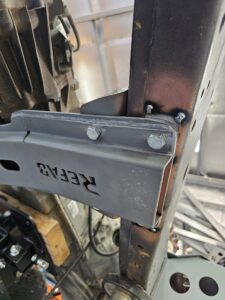
Final fitment.
- Tack weld captive nut plates insure they are square with chassis.
- Tack weld chassis brackets insure they are level with crossmember.
- Cut Crossmember: Once satisfied with the positioning, cut the crossmember to length. Cutting it at the same angle as the chassis, just before the radius, gives it a professional, factory-like finish.
